Whether you're a hobbyist working on IoT projects or a developer managing a home server, SSH offers a secure way to interact with your device. But how do you set it up to work over the internet? This article will guide you step-by-step through the process, ensuring your connection is safe and reliable. With the right tools and configurations, you can access your Pi from anywhere, anytime. Accessing your Raspberry Pi remotely is not just convenient; it’s essential for managing projects, troubleshooting issues, or simply experimenting with new ideas. The process involves configuring SSH on your Pi, setting up port forwarding on your router, and ensuring your connection is secure. While the concept might sound daunting at first, it’s surprisingly straightforward once you break it down into manageable steps. By the end of this guide, you’ll have the knowledge and confidence to establish a secure remote connection to your Pi. Why is SSH so important? It’s not just about convenience—it’s about security. Unlike other remote access methods, SSH encrypts your data, protecting it from potential threats. This is especially critical when accessing your Pi over the internet, where vulnerabilities can be exploited. We’ll explore everything you need to know, from enabling SSH on your Pi to configuring Dynamic DNS and using secure protocols. By the time you finish reading, you’ll be equipped with the tools and techniques to make remote access seamless and safe.
Table of Contents
- What is SSH and Why Use It?
- How Do I Enable SSH on My Raspberry Pi?
- How Do I Configure Port Forwarding on My Router?
- What is Dynamic DNS and Why Do I Need It?
- How Do I Secure My SSH Connection?
- Can I Use SSH Over the Internet Without Port Forwarding?
- Troubleshooting Common SSH Issues
- FAQs About SSH and Raspberry Pi
What is SSH and Why Use It?
SSH, or Secure Shell, is a cryptographic network protocol used for secure communication between two devices over an unsecured network. It’s widely used for remote administration of servers and devices, including Raspberry Pi. SSH ensures that all data transmitted between your computer and the Pi is encrypted, making it nearly impossible for hackers to intercept sensitive information.
Using SSH to access your Raspberry Pi over the internet is a game-changer. It allows you to execute commands, transfer files, and manage your Pi without needing physical access. For example, you can update software, monitor system performance, or even control IoT devices connected to your Pi—all from the comfort of your laptop or smartphone. This level of flexibility is invaluable for tech enthusiasts and professionals alike.
Read also:Decoding The Age Of Vicky Jain A Complete Overview
Additionally, SSH is lightweight and efficient, consuming minimal resources on your Pi. Unlike graphical interfaces, which can be resource-intensive, SSH operates entirely through the command line. This makes it ideal for low-power devices like the Raspberry Pi, ensuring smooth performance even during intensive tasks.
How Do I Enable SSH on My Raspberry Pi?
Enabling SSH on your Raspberry Pi is the first step toward remote access. Fortunately, the process is straightforward, whether you’re using a desktop interface or the terminal.
Enabling SSH via Raspberry Pi Settings
If you’re using the Raspberry Pi desktop environment, you can enable SSH through the settings menu:
- Open the Raspberry Pi Configuration tool by clicking on the menu and navigating to Preferences > Raspberry Pi Configuration.
- Go to the "Interfaces" tab and locate the SSH option.
- Click "Enable" and then confirm your choice.
- Reboot your Pi to apply the changes.
Using the Terminal to Enable SSH
For those who prefer the command line, enabling SSH via the terminal is equally simple:
- Open the terminal on your Raspberry Pi.
- Type the following command and press Enter:
sudo raspi-config. - Navigate to "Interfacing Options" and select "SSH."
- Choose "Yes" to enable SSH and exit the configuration tool.
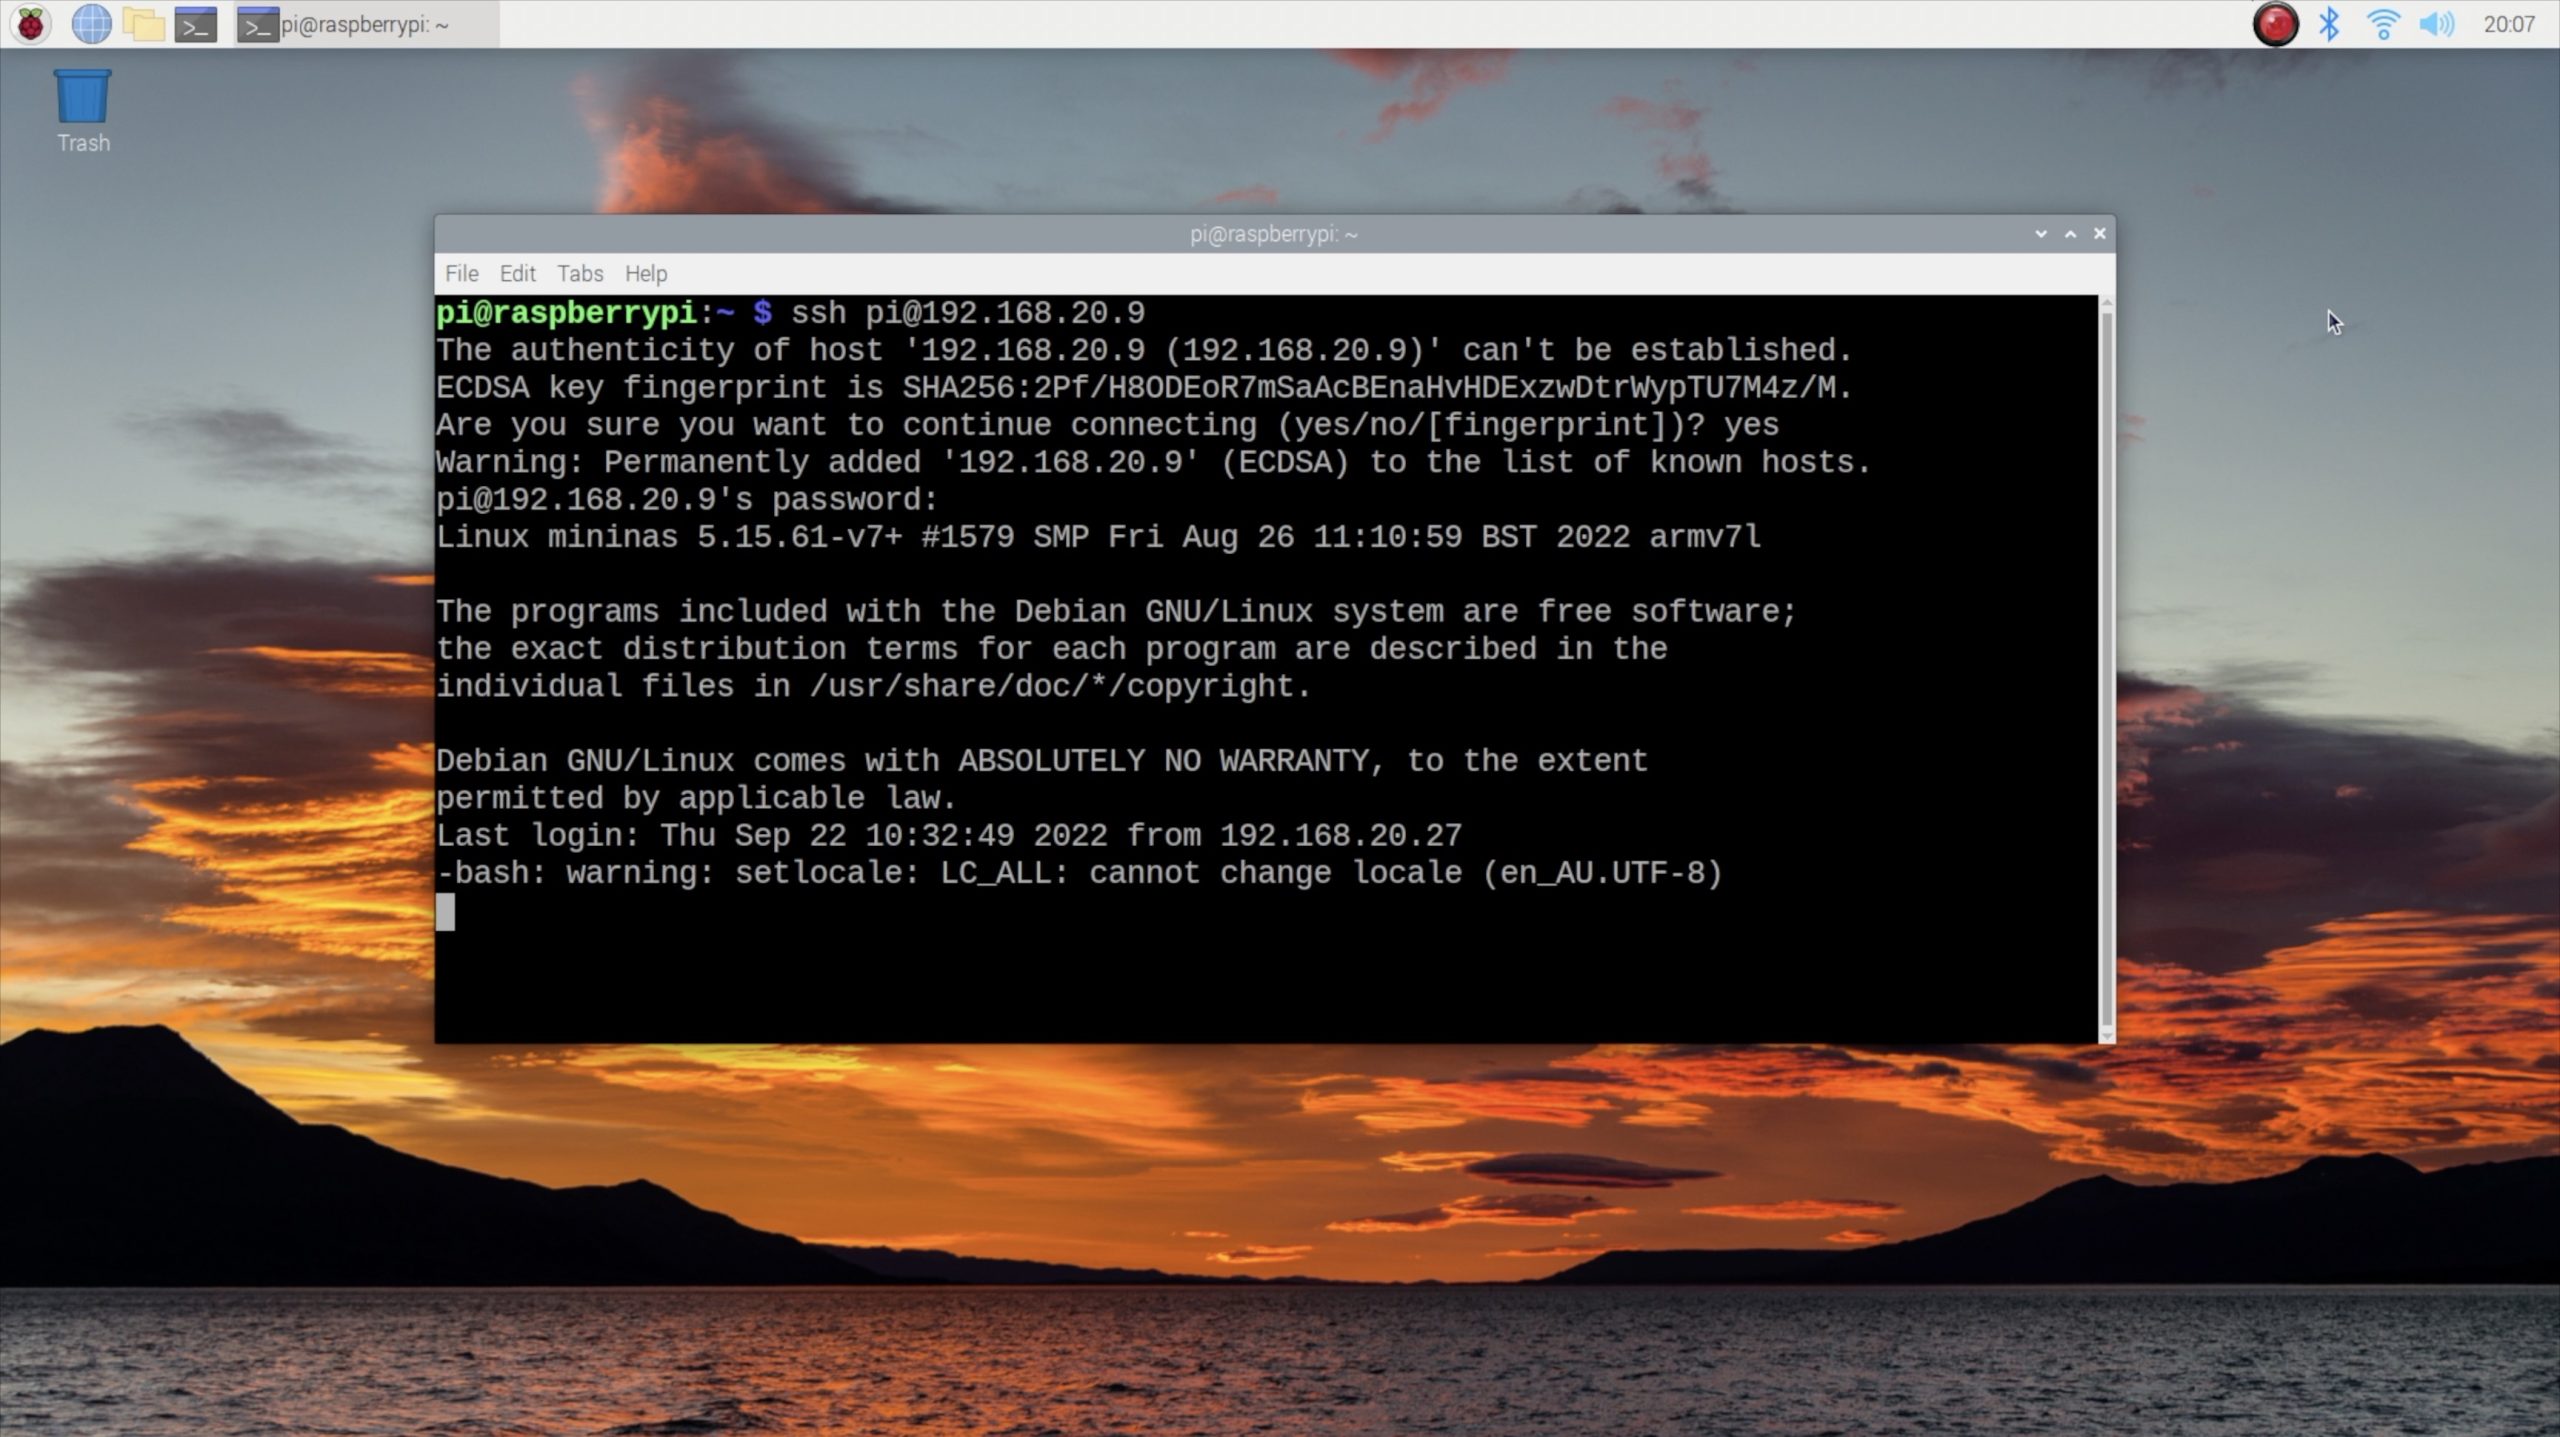
Once SSH is enabled, you can test the connection by accessing your Pi from another device on the same network. Use the command ssh pi@ to establish a connection. If successful, you’re ready to move on to the next steps.
How Do I Configure Port Forwarding on My Router?
Port forwarding is essential for accessing your Raspberry Pi over the internet. It allows external devices to connect to your Pi by routing traffic through your router.
Read also:Net Worth Of Macaulay Culkin A Detailed Insight Into His Wealth
Finding Your Router’s Port Forwarding Settings
Every router has a unique interface for managing port forwarding. To access these settings:
- Open a web browser and enter your router’s IP address (commonly 192.168.1.1).
- Log in using your admin credentials (check your router’s manual if you’re unsure).
- Look for a section labeled "Port Forwarding," "NAT," or "Advanced Settings."
Setting Up Port Forwarding for SSH
Once you’ve located the port forwarding section:
- Create a new rule and assign it a name (e.g., "Raspberry Pi SSH").
- Set the external port to 22 (default for SSH) or choose a custom port for added security.
- Enter your Pi’s local IP address and set the internal port to 22.
- Save the rule and restart your router to apply the changes.
With port forwarding configured, your Pi is now accessible from the internet. However, it’s crucial to secure your connection to prevent unauthorized access.
What is Dynamic DNS and Why Do I Need It?
Most home internet connections use dynamic IP addresses, which change periodically. This can make it challenging to connect to your Pi over the internet. Dynamic DNS (DDNS) solves this problem by assigning a hostname to your IP address, which updates automatically whenever your IP changes.
To set up DDNS, you’ll need to sign up for a service like No-IP or DuckDNS. These platforms provide a free hostname that you can use to access your Pi. Simply install the DDNS client on your Pi or router, configure it with your credentials, and you’re good to go.
Using DDNS ensures that your Pi remains accessible even if your IP address changes. It’s a simple yet effective solution for maintaining a stable connection.
How Do I Secure My SSH Connection?
Securing your SSH connection is vital to protect your Pi from potential threats. Here are some best practices:
- Change the default SSH port from 22 to a non-standard port.
- Disable password authentication and use SSH keys for login.
- Set up a firewall to restrict access to trusted IP addresses.
By implementing these measures, you can significantly reduce the risk of unauthorized access.
Can I Use SSH Over the Internet Without Port Forwarding?
If you’re hesitant to configure port forwarding, there are alternative methods to access your Pi remotely. Services like Ngrok or Tailscale allow you to create secure tunnels to your Pi without modifying your router settings.
These tools are particularly useful for users who don’t have administrative access to their router or want a simpler setup. However, they may introduce slight latency compared to traditional port forwarding.
Troubleshooting Common SSH Issues
Encountering issues while setting up SSH is not uncommon. Here are some common problems and their solutions:
- Connection Refused: Ensure SSH is enabled on your Pi and the correct port is open on your router.
- Authentication Failed: Double-check your username and password or verify your SSH key.
- Slow Connection: Test your internet speed and consider switching to a wired connection for better performance.
FAQs About SSH and Raspberry Pi
1. How do I SSH into Pi over the internet using a custom port?
To use a custom port, modify the SSH configuration file on your Pi by editing /etc/ssh/sshd_config and changing the "Port" value. Update your router’s port forwarding rule accordingly.
2. Can I use SSH on a Raspberry Pi without a monitor?
Yes, you can enable SSH by creating an empty file named "ssh" in the boot directory of your Pi’s SD card before the first boot.
3. Is it safe to use SSH over public Wi-Fi?
While SSH encrypts your data, it’s advisable to use a VPN for an additional layer of security when connecting over public networks.
For more information on securing your Raspberry Pi, check out this official guide.
By following this comprehensive guide, you’ll be able to securely access your Raspberry Pi from anywhere in the world. Whether you’re troubleshooting a project or managing your home server, SSH provides the flexibility and security you need.